

If you are in my gardening group, or you attended my recent gardening workshop, you know that I one of my favorite seed starting tools is the Park Seed Bio Dome. If you’re looking for an easy and efficient way to start seeds indoors, the Park Seed Bio Dome is a game-changer. Whether you’re a beginner gardener or a seasoned pro, this system provides the perfect environment for strong, healthy seedlings.
Check out my Park Seed Bio Dome Seed Starting Video…
Want one? Buy a Park Seed Bio Dome and use my code LITTLETECHGIRL15 for 15% off your order. But, be sure to check the top of the site for current codes that might be a better deal.
What is the Park Seed Bio Dome?
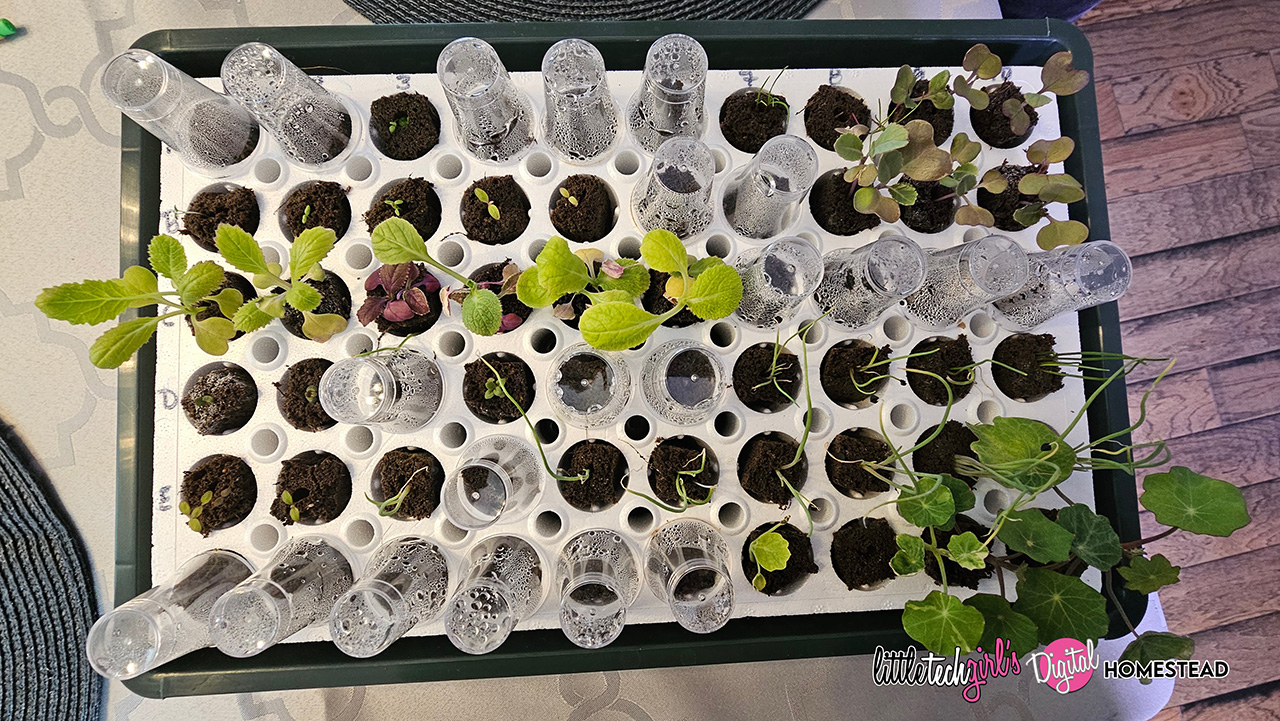
The Park Seed Bio Dome is a self-contained seed-starting system designed to simplify the germination process. Unlike traditional soil seed trays, the Bio Dome features biodegradable planting sponges, a humidity dome, and a sturdy base tray. These all work together to create the ideal conditions for seeds to sprout and grow.
While the 60-cell is my favorite, they actually come in several sizes. The larger 18-cell and 40-cell units are great for starting larger seeds like squash or cucumbers. If you are a hydro user, the 60-cell Bio Dome refills fit AeroGarden, LetPot, and other similar units with 1″ cages perfectly! Whenever I order from Park Seed I pick up some extra. NOTE: Only the 60-cell version fits. The others are too large.
Key Features:
- Pre-formed planting sponges hold moisture while allowing for excellent aeration. From the site… Bio Sponges are comprised of a combination of coconut coir, peat moss, and bio char and are now enriched with oilseed extract, giving your seedlings an extra boost of nutrition.
- Adjustable humidity vents help control moisture levels.
- Durable base tray holds water and keeps the system stable.
- Reusable design for multiple growing seasons.
Why Choose the Bio Dome Over Traditional Seed Trays?
Many gardeners struggle with seed trays that dry out too quickly or become waterlogged, leading to weak or even dead seedlings, or knowing what type of seed starting mix to use. Plus… over-watering can lead to dampening off. Under-watering can lead to dried seedlings. The Park Seed Bio Dome eliminates these issues by maintaining the perfect balance of moisture, air circulation, and warmth. This results in faster germination, stronger root systems, and healthier plants.
Additional Benefits:
- No need for soil—the planting sponges hold seeds in place.
- Transplants with ease—roots grow deep and strong.
- Fewer problems with damping off—better air circulation reduces fungal issues.
How to Use the Park Seed Bio Dome
First, determine good start dates for your seeds by going to the Almanac Planting Calendar and entering your zip code. You will get a full list of spring and fall crops with dates to start them. Don’t worry if you are a little late, just get them started as soon as you can.
Getting started with the Bio Dome is simple. Here’s a step-by-step guide to ensure success:
- Soak Your Sponges: While not a must, soaking the sponges ensures they are moist when planting your seeds which will help them wick up water right away. This is especially important if you are using sponges that may have been stored a while and have dried out. Sometimes they can become hydrophobic.
- Insert Your Seeds:
Carefully pick up one sponge, squeeze out a bit of extra water and place one or two seeds into each pre-formed hole. For tiny seeds, you may want to use some seed tweezers. - Put Sponges in the Bio Dome insert: As you put the seeds in, put them in the Bio Dome.
- Update Your Log: If you are planting more than one variety, don’t forget to write it down! You can use your own paper, or download my Park Seed Bio Dome planting logs. Tip: See my video above for info on how I label and number my bio domes to keep up with what I planted.
- Fill the Base with Water:
Add water to the base tray filled about halfway up. The tray will start to float. This is normal. - Cover with the Humidity Dome:
This helps retain moisture and creates a greenhouse-like effect for optimal germination. Keep the vents closed for now. - Place in a Warm Area Under a Grow Light:
A grow light will provide the warmth and light needed for germination. A grow light is best unless you have a south facing window that gets full sun for at least 12 hours of direct sunlight per day, which is not possible in most northern areas in winter. Plus windows could be cool and drafyy which seedings do not like. Need a grow light? See Choosing Indoor Grow Lights for Kratky or Seedlings. - Monitor Moisture and Growth:
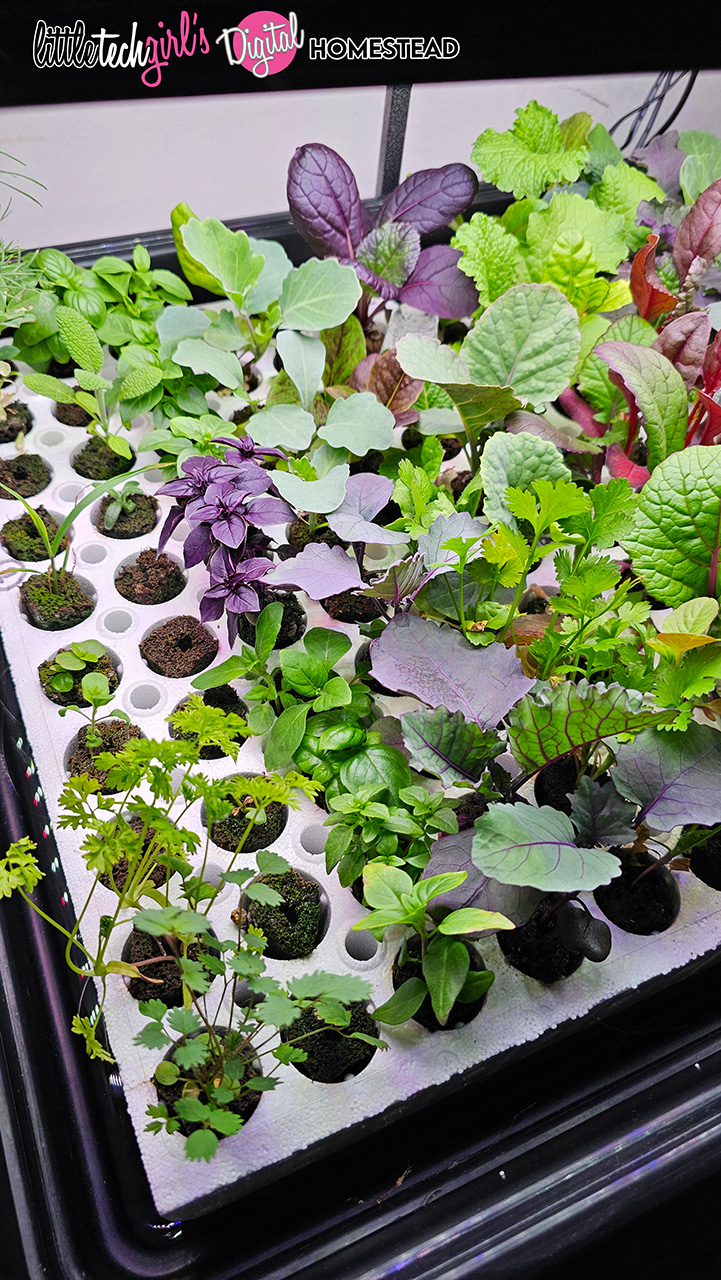
Keep an eye on water levels, and adjust humidity vents as needed. Do not let the sponges dry out. - Add Nutrients: Once your seeds sprout, it’s time to feed them. Your Bio Dome will come with a baggie of nutrients to get you started. Follow those directions, or use a diluted version of your favorite nutrients.
- Transplant When Ready:
Once seedlings develop strong roots and true leaves, they can be transplanted into larger pots or directly into your garden (after hardening off). I typically plant them up to 3-4″ pots about 4-5 weeks after sprouting.
How to Harden Off Your Seedlings
Hardening off basically means slowly introducing your plants to outside weather and the elements. They have lived a sheltered life inside with no hard winds, no bright sun, and no elements. Before they will thrive in your garden they need to get used to being outside.
The “official” way to do this is quite time consuming. It involves taking your seedlings outside for a couple of hours a day and increasing that time over several days. However, nothing about carrying 10-12 trays of seedlings up the stairs from my basement, outside, and back again each day appeals to me. Plus, taking plants in and out increases the risk of taking bugs like fungus gnats, aphids, whiteflies, and thrips in the house. And one one wants those problems! I especially don’t since I may still have plants growing in my hydroponics at that time.
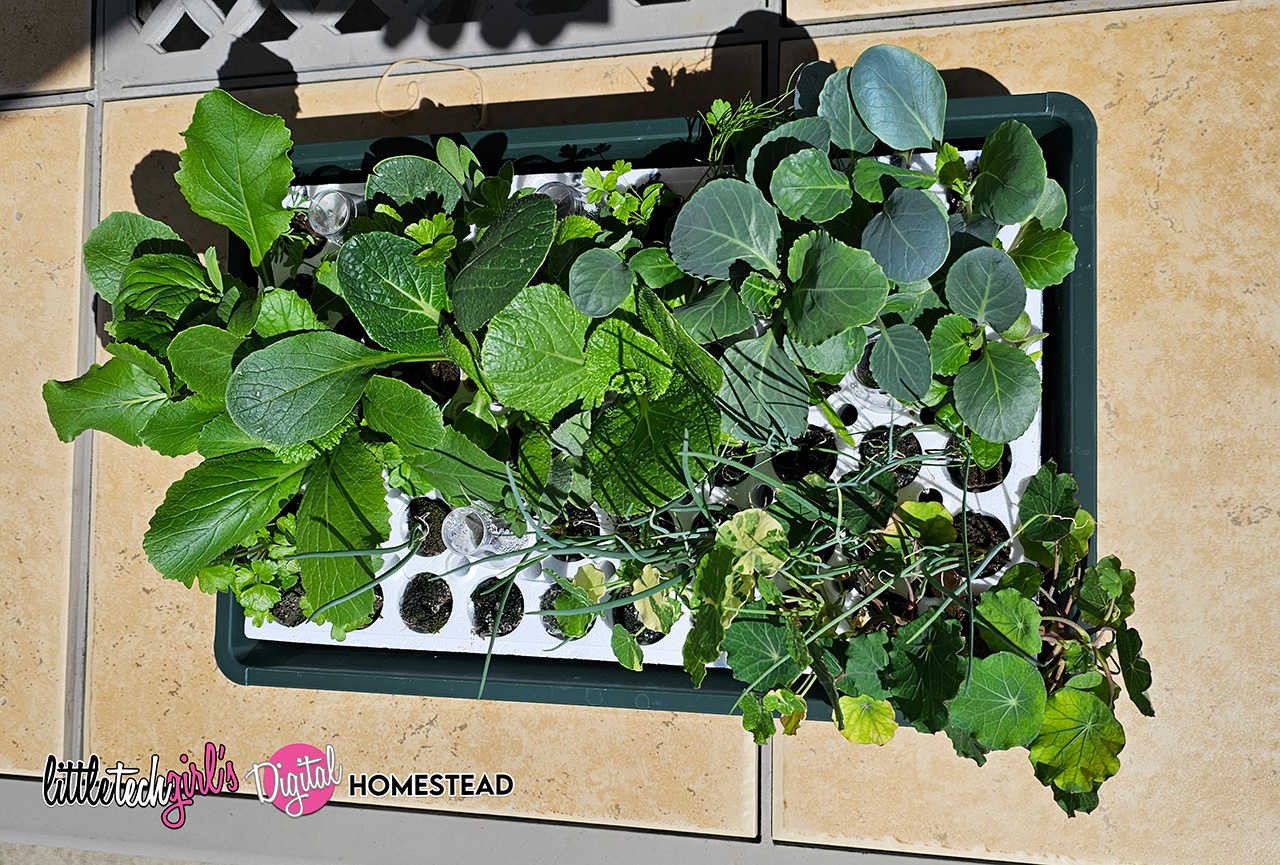
So, I now do lazy hardening off. I wait for a cloudy, cooler day above 50 degrees to put the plants out on my patio table. If the sun comes out, I put up my patio umbrella to block the bright light. I leave them there. I keep close watch. As long as it is not super hot outside, and the sun is not beaming directly on them this works. I also have a greenhouse, so I have the option of putting them in there if the weather takes a nose dive. After the plants stay there for 6-7 days I plant them in their garden spots. And during this process don’t forget to keep them watered.
Oh, and another tip… depending on when you started your seedlings, you may not have have had to pot them up. If you start a late round of plants less than 4 weeks before planting time you can harden off right in the bio dome. If this is the case just take the bio dome itself outside for hardening off.
The Park Seed Bio Dome makes seed-starting easy, ensuring you get a head start on a successful growing season. With its innovative design, ease of use, and reliable results, it’s one of my favorite tools for growing strong, healthy plants from seed. Whether you’re starting flowers, herbs, or vegetables, this system will give you a gardening edge!
Want one? Buy a Park Seed Bio Dome and use my code LITTLETECHGIRL15 for 15% off your order. But, be sure to check the top of the site for current codes that might be a better deal.
Do you use the Bio Dome for your seed-starting? Let us know your experience in the comments!
Leave a Reply